Get started with Wonder MCP
Written By Aibek Yegemberdin
Last updated 3 months ago
Design and code have always lived in separate worlds. Wonder changes that. The Wonder MCP server gives your AI coding agent direct read and write access to your Wonder canvas - pull designs into code, or push code back into designs.
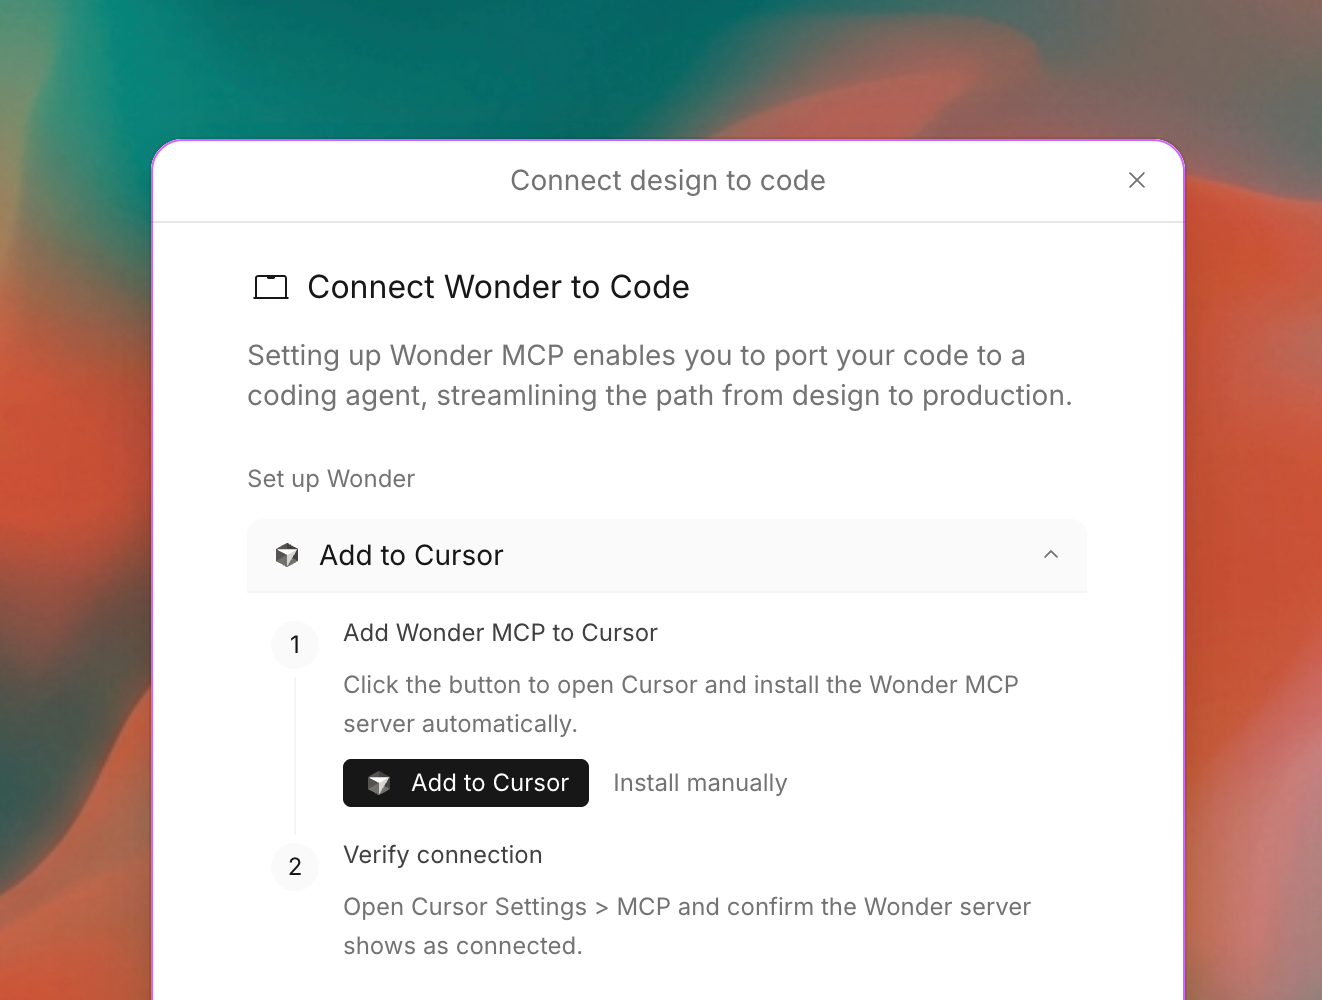
Add Wonder MCP to Cursor
Step 1: Add Wonder MCP to Cursor
Click the button below to open Cursor and install the Wonder MCP server automatically.
Or install manually: Copy the JSON below and add it to your Cursor MCP config at Settings > MCP, or paste it into ~/.cursor/mcp.json.
{
  "mcpServers": {
    "wonder": {
      "serverUrl": "https://mcp.wonder.so/mcp"
    }
  }
}
Step 2: Verify connection
Open Cursor Settings > MCP and confirm the Wonder server shows as connected.
Step 3: Sign in to Wonder
A Connect button will appear next to Wonder in your MCP settings. Click it and sign in to your Wonder account in the browser window that opens.
Claude Code
Step 1: Add Wonder MCP to Claude Code
Run the command below in your terminal (not in Claude) to register the Wonder MCP server.
claude mcp add --transport http wonder https://mcp.wonder.so/mcpStep 2: Verify connection
Run claude mcp list to confirm the Wonder server appears.
Step 3: Sign in to Wonder
Open a Claude Code session and run /mcp. You should see Wonder in the list of MCPs. If you don’t see it, restart your Claude session. Wonder prompt you to sign in to your Wonder account in the browser. Once done, your agent is connected and ready to go. Tokens are refreshed automatically - you should only need to do this once.
Terminals can be confusing if you’re non-technical. If you have trouble setting up Claude Code, you can watch this tutorial here or ask an AI agent of your choice to help you set it up.
Claude Desktop
Step 1: Ensure Node.js is installed
Claude Desktop requires Node.js to run MCP servers. Verify by running node --version in your terminal.
Step 2: Add Wonder MCP to Claude Desktop
Open Claude Desktop Settings > Developer > Edit Config. This opens your claude_desktop_config.json file.
Your file right now probably looks something like this:
{
   "preferences": {
   "coworkWebSearchEnabled": true,
   "ccdScheduledTasksEnabled": true,
   "sidebarMode": "chat"
  }
 }
Add the Wonder MCP section so it looks like this:
{
  "mcpServers": {
    "wonder": {
      "command": "npx",
      "args": [
        "mcp-remote",
        "https://mcp.wonder.so/mcp"
      ]
    }
  },
  "preferences": {
    "coworkWebSearchEnabled": true,
    "ccdScheduledTasksEnabled": true,
    "sidebarMode": "chat"
  }
}
Save the file. The key things to get right: add the entire "mcpServers": { ... } block before the "preferences" line, and make sure there's a comma after the closing } of mcpServers.
Step 3: Sign in to Wonder
Fully quit and restart Claude Desktop. A browser window will open automatically asking "MCP CLI Proxy would like access to your account." Click Allow access. The browser will confirm "Authorization successful!" — you can close it and return to Claude.
Step 4: Verify connection
Check that the Wonder server appears as connected — look for the MCP indicator in the chat input area.
Codex
Step 1: Add Wonder MCP to Codex
Run the command below in your terminal to register the Wonder MCP server.
codex mcp add wonder --url https://mcp.wonder.so/mcp You can also configure it manually via config.toml.
Step 2: Verify connection
Run codex mcp list and confirm the Wonder server appears.
Antigravity
Step 1: Open your MCP config
In Antigravity, click the ⋯ menu in the Agent panel > MCP Servers. Then select Manage MCP Servers > View raw config. This opens your mcp_config.json file.
The file is located at:
macOS/Linux:
~/.gemini/antigravity/mcp_config.jsonWindows:
C:\Users\<USERNAME>\.gemini\antigravity\mcp_config.json
Step 2: Add Wonder MCP to Antigravity
Add the following configuration to your mcp_config.json file. Note that Antigravity uses serverUrl instead of url for remote MCP servers.
{
  "mcpServers": {
    "wonder": {
      "serverUrl": "https://mcp.wonder.so/mcp"
    }
  }
}
Step 3: Verify connection
Close and reopen Antigravity. Go to MCP Servers and confirm Wonder appears with its tools listed.
Lovable
Step 1: Open Personal Connectors
In Lovable, go to Settings → Connectors → Personal connectors. You can also click + in the prompt box and go to Connectors for quick access.
Custom MCP servers require a paid Lovable plan.
Step 2: Add Wonder as an MCP server
Click New MCP server. Enter Wonder as the name and paste the server URL:
https://mcp.wonder.so/mcp Select No authentication and click Add server.
Step 3: Verify connection
Wonder should now appear in your list of personal connectors. You can reference your Wonder designs directly in prompts.
Other MCP clients
If your client isn't listed above, you can set up Wonder manually. The server URL is:
https://mcp.wonder.so/mcp Most MCP clients accept a JSON config like this:
{
  "mcpServers": {
    "wonder": {
      "serverUrl": "https://mcp.wonder.so/mcp"
    }
  }
}
If your client doesn't support remote URLs natively, use the mcp-remote bridge:
{
  "mcpServers": {
    "wonder": {
      "command": "npx",
      "args": [
        "mcp-remote",
        "https://mcp.wonder.so/mcp"
      ]
    }
  }
}
This requires Node.js to be installed.
Try it out
Once Wonder is connected, you're ready to go. Open a chat in your agent of choice and try one of these prompts to make sure everything is working:
If you have an existing codebase:
"Read my Tailwind config and create a design in Wonder using my exact colors, typography, and spacing."
If you're starting fresh:
"Create a simple landing page hero in Wonder with a headline, subheadline, and a call-to-action button."
To test the round-trip:
"Look at my existing app's header component and design a matching hero section in Wonder."
Your agent will use the Wonder MCP tools to read and write directly to your canvas. You can then open Wonder to see the result.
FAQ
Where can I report issues or request features?
Head to our Feature Requests board or drop a message in our Discord.